
Comprehensive Guide to BT-1 vs. BT-2: Differences, Setup, and Monitoring
Most Renogy solar energy devices support BT-1 or BT-2 Bluetooth module which allows you to monitor your energy consumption data via monitoring devices such as Renogy BT app, the DC Home app or/and Renogy ONE Core. This article discusses the following:
- Differences between BT-1 and BT-2
- BT-1 and BT-2 interoperability matrix
- Installation and monitoring guide
- FAQ
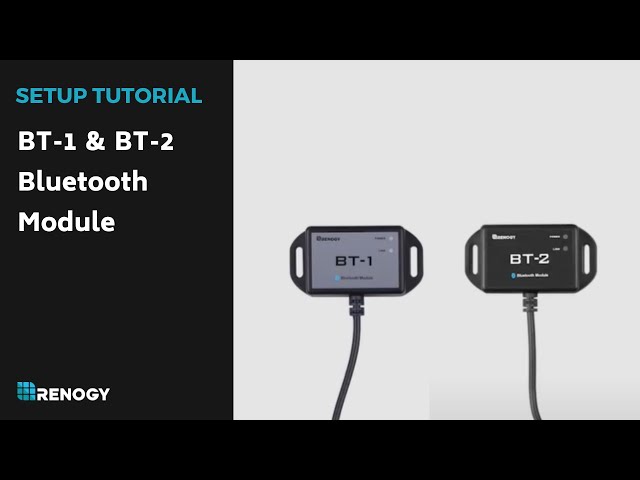
BT-1 vs. BT-2: What Are the Differences?
While Shari Galiardi and David Hutchison, two of Renogy dedicated customers, have discussed the differences between the two modules from their first-hand experience in BT-1 vs BT-2: What's the Difference & Which is Best for You?, the table below depicts the technology-wise differences:
| Item | BT-1 Bluetooth Module | BT-2 Bluetooth Module |
|---|---|---|
| Communication Protocol | RS232 | RS485 |
| Port Type | RJ12 | RJ45 |
| Input Voltage | 5V | 5V or 12V |
| Communication Range | ≤ 82 ft (25m) | ≤ 82 ft (25m) |
| Dimensions | 2.65 X 1.38 X 0.55 in (67.3 X 35 X 14 mm) | 2.65 X 1.38 X 0.55 in (67.3 X 35 X 14 mm) |
| Monitoring Device |
|
|
| Interoperability Matrix | See BT-1 Interoperability Matrix | See BT-2 Interoperability Matrix |
| Protection Grade | IP54 | IP54 |
Boasting the same dimensions, communication range, and protection grade, the BT-1 Bluetooth module differs from the BT-2 Bluetooth module in communication protocol, input voltage, communication port type, and interoperable energy devices such as charge controller, battery, and battery chargers.
BT-1 and BT-2 Interoperability Matrix
In general, the BT-1 Bluetooth module is compatible with Renogy energy devices supporting RS232 communication while the BT-2 Bluetooth module interoperates with Renogy energy devices supporting RS485 communication. Refer to the user manual or specification sheet of the specific energy device.
BT-1 Interoperability Matrix
| Product Type | Model SKU |
|---|---|
| Charge Controller | Adventurer Li- 30A PWM Flush Mount Charge Controller w/ LCD Display (RNG-CTRL-ADV30-LI) |
| Wanderer 10A PWM Charge Controller (RNG-CTRL-WND10) | |
| Wanderer Li 30A PWM Charge Controller (RNG-CTRL-WND30-LI) | |
| Rover Li 20 Amp MPPT Solar Charge Controller (RNG-CTRL-RVR20. Only for G1 versions.)* | |
| Rover Li 30 Amp MPPT Solar Charge Controller (RNG-CTRL-RVR30. Only for G1 versions.)* | |
| Rover Li 40 Amp MPPT Solar Charge Controller (RNG-CTRL-RVR40. Only for G1 versions.)* | |
| Rover 60 Amp MPPT Solar Charge Controller (RNG-CTRL-RVR60) | |
| Rover 100 Amp MPPT Solar Charge Controller (RNG-CTRL-RVR100) | |
| Rover 60 Amp Positive Ground MPPT Solar Charge Controller (RNG-CTRL-RVRPG60) | |
|
Solar Kit |
400 Watt 12 Volt Solar RV Kit (RNG-KIT-RV400D-ADV30) |
| 600W 12V/24V Monocrystalline Solar Premium Kit w/Rover 60A Charger Controller (RKIT600DPM-RVR60) | |
| 800W 12V/24V Monocrystalline Solar Premium Kit w/Rover 60A Charger Controller (RKIT800DPM-RVR60) | |
| New 400 Watt 12 Volt Solar Premium Kit (RNG-KIT-PREMIUM400D-RVR40) |
*The Rover Li series is unique: G1 versions with RS232 ports are compatible with BT-1, while G2 versions with RS485 ports support BT-2 exclusively. For assistance in identifying your charge controller's generation, contact our dedicated customer service.
BT-2 Interoperability Matrix
| Product Type | Model SKU |
|---|---|
|
Charge Controller
|
Rover Elite 20A MPPT Solar Charge Controller (RCC20RVRE) |
| Rover Elite 40A MPPT Solar Charge Controller (RCC40RVRE) | |
| 36V/48V Rover Boost 10A MPPT Solar Charge Controller (RCC10RVRB) | |
| Rover Li 20 Amp MPPT Solar Charge Controller (RNG-CTRL-RVR20. Only for G2 versions.)* | |
| Rover Li 30 Amp MPPT Solar Charge Controller (RNG-CTRL-RVR30. Only for G2 versions.)* | |
| Rover Li 40 Amp MPPT Solar Charge Controller (RNG-CTRL-RVR40. Only for G2 versions.)* | |
| Rover 60 Amp MPPT Solar Charge Controller (RNG-CTRL-RVR60) | |
| Rover 100 Amp MPPT Solar Charge Controller (RNG-CTRL-RVR100) | |
| Battery Charger | DCC30S 12V 30A Dual Input DC-DC On-Board Battery Charger with MPPT (RBC30D1S) |
| DCC30S 12V 50A Dual Input DC-DC On-Board Battery Charger with MPPT (RBC50D1S) | |
| Inverter Charger | 48V 3500W Solar Inverter Charger (RIV4835CSH1S) |
| 1000W 12V Pure Sine Wave Inverter with Power Saving Mode (New Edition) (R-INVT-PGH1-10111S) | |
| 2000W 12V Pure Sine Wave Inverter with Power Saving Mode (New Edition) (R-INVT-PGH1-20111S) | |
| Battery | 48V 50Ah Smart Lithium Iron Phosphate Battery (RBT50LFP48S) |
| 12V 100Ah Smart Lithium Iron Phosphate Battery w/ Self-Heating Function (RBT100LFP12SH) | |
| 12V 100Ah Smart Lithium Iron Phosphate Battery (back-order) (RBT100LFP12S) | |
| LYCAN 5000 Power Box (RPB4835OA-48LFPA12S) |
*The Rover Li series is unique: G1 versions with RS232 ports are compatible with BT-1, while G2 versions with RS485 ports support BT-2 exclusively. For assistance in identifying your charge controller's generation, contact our dedicated customer service.

Prior to pairing the BT-1 or BT-2 module with your monitoring device, please ensure:
- The app version and the firmware version of Renogy ONE Core have been updated to the latest version.
- The versions of the Renogy BT and DC Home apps as well as ONE Core might have been updated. Illustrations in the article are for reference only. Follow the instructions based on the current app version.
Installation & Monitoring Guide for Renogy BT App Users

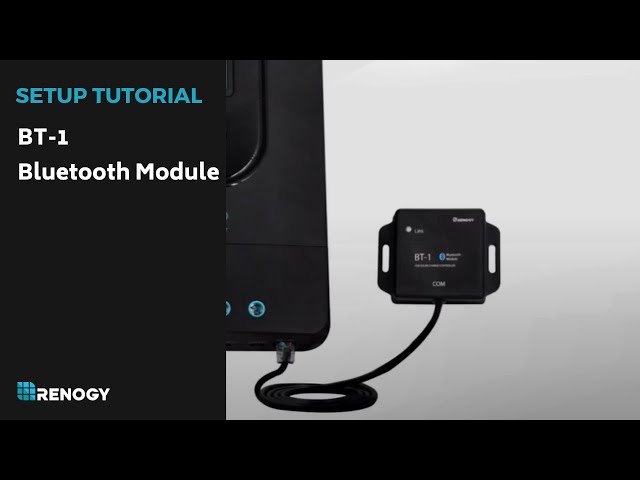
Step 1: Place or mount the BT-1 or BT-2 module indoors at -4°F to 185°F (-20°C to 85°C), protected from direct sunlight and rain.
Step 2: Plug the RJ12 Port or RJ45 Port into the RS232 or RS485 port on the power device.
Step 3: Wait until the Power Indicator is solid green. This indicates the Bluetooth module is powered on.
Step 4: On the smartphone where the Renogy BT app is installed, turn on Bluetooth.
Step 5: On the Renogy BT app, tap Device Info > Search device, tap the module name under the "Devices found:" list, and tap Confirm to complete the pairing. The Link Indicator on the Bluetooth module starts to flash in blue which represents normal communication between the module and the app.
Step 6: Tap "Monitoring" to view your system details.
Alternatively, you can watch the instruction video for paring Renogy BT-1 Bluetooth module with your phone via the Renogy BT app below.
Installation & Monitoring Guide for Renogy DC Home App Users

The following instructions apply to scenarios where multiple BT modules are involved. For users who adopt a Renogy Communication Module and only one BT-2 module, see the instructions in "For Communication Hub Users".
Step 1: Place or mount the BT-1 or BT-2 module indoors at -4°F to 185°F (-20°C to 85°C), protected from direct sunlight and rain.
Step 2: Plug the RJ12 Port or RJ45 Port into the RS232 or RS485 port on the power device.
Step 3: Wait until the Power Indicator is solid green. This indicates the Bluetooth module is powered on.
Step 4: On the smartphone where the DC Home app is installed, turn on Bluetooth.
Step 5: On the DC Home app, tap + to search for new devices.
Step 6: Tap Confirm to add the newly found device to the device list. The Link Indicator on the Bluetooth module starts to flash in blue which represents normal communication between the module and the app.
Step 7: Tap the device icon to monitor the device information.
You can pair the DC Home app with Renogy ONE Core for remote power management and monitoring anytime, anywhere. For details, refer to the Renogy ONE Core User Manual.
Alternatively, you can watch the instruction video for paring Renogy BT-1 or BT-2 Bluetooth module with your phone via Renogy BT app or DC Home app below.
Installation & Monitoring Guide for Renogy ONE Core Users

The following instructions apply to scenarios where multiple BT modules are involved. For users who adopt a Renogy Communication Module and only one BT-2 module, see the instructions in "For Communication Hub Users".
Step 1: Place or mount the BT-1 or BT-2 module indoors at -4°F to 185°F (-20°C to 85°C), protected from direct sunlight and rain.
Step 2: Plug the RJ12 Port or RJ45 Port into the RS232 or RS485 port on the power device.
Step 3: Wait until the Power Indicator is solid green. This indicates the Bluetooth module is powered on.
Step 4: On Renogy ONE Core, tap Devices > Add Devices, and Renogy ONE Core automatically searches for Bluetooth devices nearby.
Step 5: Select the device you want to pair with ONE Core, and tap Add. The Link Indicator on the Bluetooth module starts to flash in blue which represents normal communication between the module and the app.
Step 6: Tap the device icon to monitor the device information.
You can pair the DC Home app with Renogy ONE Core for remote power management and monitoring anytime, anywhere. For details, refer to the Renogy ONE Core User Manual.
Installation & Monitoring Guide for Communication Hub Users

When adding multiple devices to Renogy ONE Core or DC Home through the Communication Hub via just one BT-2 Bluetooth module, connect every single device to Renogy ONE Core or DC Home individually through the hub first, and then reconnect all devices to the hub. Turn to the Communication Hub Manual for more details.
FAQ
Q1: Is BT-1 or BT-2 Bluetooth Module Compatible with Non-Renogy Energy Devices?
Partially yes. Both BT-1 Bluetooth module and BT-2 Bluetooth module work seamlessly with Renogy energy devices supporting RS232 and RS485 communication protocol respectively. Due to communication protocol differences, we cannot guarantee the full compatibility with non-Renogy devices. Renogy energy devices should always be your first choice.
Q2: Which Monitoring Device Do You Recommend for BT-1 and BT-2 Bluetooth Modules?
It depends on your application scenarios.
- For short-range monitoring, use DC Home as a first choice because Renogy BT app is no longer updated as of May 2021.
- For remote monitoring, use both DC Home and Renogy ONE Core.
Q3: Is Internet Access Necessary for Power Monitoring in the DC Home App?
No. Internet access is optional in the DC Home app. The app provides Offline Mode for users encountering poor or no internet access. In this mode, you can manage and monitor energy devices in the DC Home app but have no access to features such as Community, Store, and Rays Shop that require internet connection.
Q4: What Affects the Communication Quality of BT-1 and BT-2 Modules?
Several factors can impact the communication quality of BT-1 and BT-2 modules:
- Distance: The ideal distance between BT-1 or BT-2 and DC Home or Renogy ONE is within 10m (32 ft), though this may vary depending on the specific energy device.
- Obstacles: Physical obstacles around BT-1 and BT-2 can interfere with signal strength.
- Interference: Presence of other electronic devices operating on the same frequency band may cause signal interference.


